


How to Add Backing to a Thrifted Picture Frame
Have you ever found a unique thrift store frame and passed on it because it didn’t have a back? This post will walk you through the steps to repurpose your treasured find into a usable statement piece.
I wouldn’t call myself a regular thrifter but when the right design project arises, I love to search the aisles of my favorite Dallas second hand stores. I have an obsession with one of a kind design elements and typically I can find some quality, unique frames while thrifting which keeps me on the hunt.
Now on the other hand, when it come to finding unique furniture I look at antique shops due to the higher quality, but I’ve sadly found that antique shops mark up their frames. So I always start my frame hunt at thrift shops and move to antique stores if I’m not finding what I need.

The downside with thrift stores is that you may find a beautiful picture frame without backing or glass but this is why you’re getting a good deal! Don’t let a thrift store frame makeover freak you out. I promise these steps are simple and won’t take a whole day of crafting.
DIY Picture Frame Backing
Now if you’ve purchased a thrift store picture frame with a standard size, it might be worth it to get the same size frame from the dollar store and swap the back. For frames that aren’t standard or are larger than a 8×10, I’d suggest making your own back.
Types of Picture Frame Backs
You may be asking yourself what to use for frame backing? There are several picture frame backing material options but some can be harder to source in custom sizes or don’t provide much support. Particle wood is what you’d typically find in a store bought frame but is a challenge to cut. I’ve also read of people using thick card stock but my favorite material is actually cardboard as it’s readily available, fairly sturdy and easy to cut with a box cutter. Another similar material is foam board but why spend the money if you already have cardboard left over from your last Amazon shipment?
If you decide to go with cardboard, use a piece that doesn’t have a fold. A crease could weaken the backing and misconstrue your measurements.
Steps for Cutting Picture Frame Backing
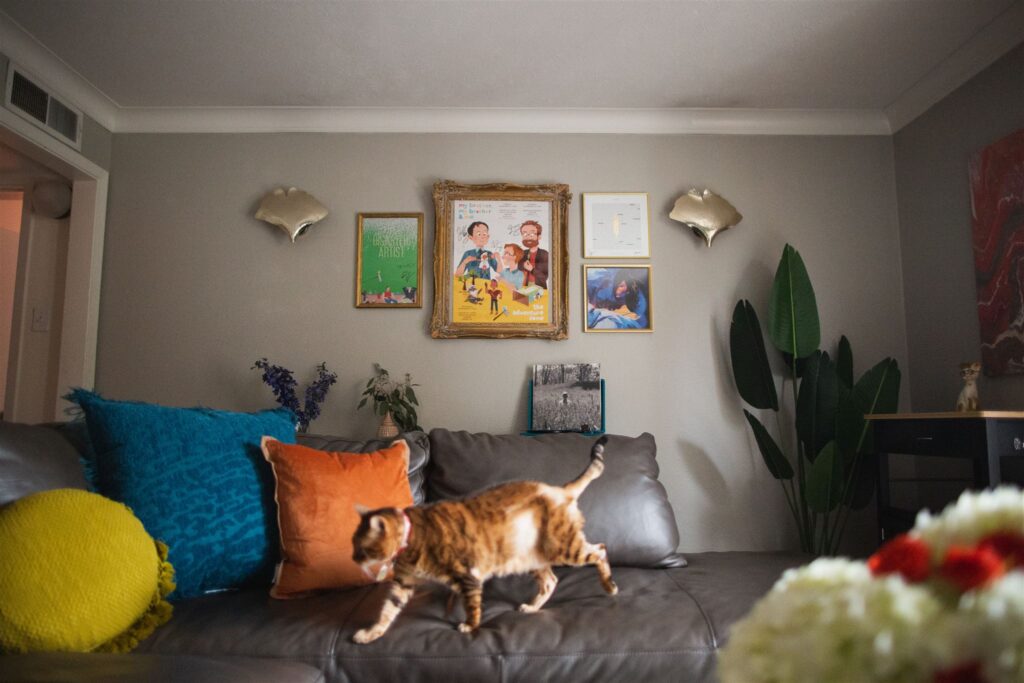
For my specific project, I had a 17X24 gold, ornate frame. Not a standard size but definitely a one of a kind frame. In order to create a back, I used a large piece of cardboard that I had from a furniture shipment. Make sure when you measure your frame opening that you consider the “lip” on the back side. You want the back to fit in the opening but overlap with the indented edge so it doesn’t fall through.
Start by drawing your square dimensions on the cardboard and then cut with a box cutter. Once you have your cardboard cut, it is time to fit your art in the frame. In my case, the art wasn’t an exact fit for the frame so I added a matte on the sides. If you decide to add a matte as well, make sure the thickness doesn’t prohibit the cardboard from fitting on the back.
For this signed poster, I decided to pass on a glass front. If you want a more polished look, you can go to any glass store and have them cut a custom piece for relatively cheap ($8-$20 depending on the size).
When your art is placed, there are two options for attaching. You could use masking tape around the edges or staple the edges into the frame. With the masking tape, if you have a larger frame then I’d encourage you to also tape across the back for extra support. If you decide to go the stapling route then use a stapling gun. I used 3/8″ staples but you may want to adjust depending on the thickness of your cardboard and frame.
There are two caveats for stapling, your frame must be made of wood and cannot have glass in the front. If you added a matte or your art exactly fits the frame then also consider that your staple may add holes to these elements. Obviously, the staple option is more permanent but it’s also extra secure. Since this gallery wall was meant to be eclectic, I liked the look without glass and went the stapling route.
Attaching Mounting Hardware
If your frame doesn’t have a back, there’s also a good chance that it needs new mounting hardware in order to hang. My frame already had two hooks so I just added hanging wire. If there wasn’t already hooks, I would’ve used a sawtooth hanger (link here). Not only is a sawtooth easy to add to a wooden frame but it’s also fool proof when it comes to hanging the frame on the wall.
How else have you repurposed thrift store frames in your home? I love how a little creativity can bring so much character to a design.
Sincerely,
HMD

