


Update Your Concrete Patio with a Wood Deck Look
Give your home a facelift and add timeless elegance by covering your concrete steps with wood. Find out the best way to go about it, from choosing the right materials to the design process.
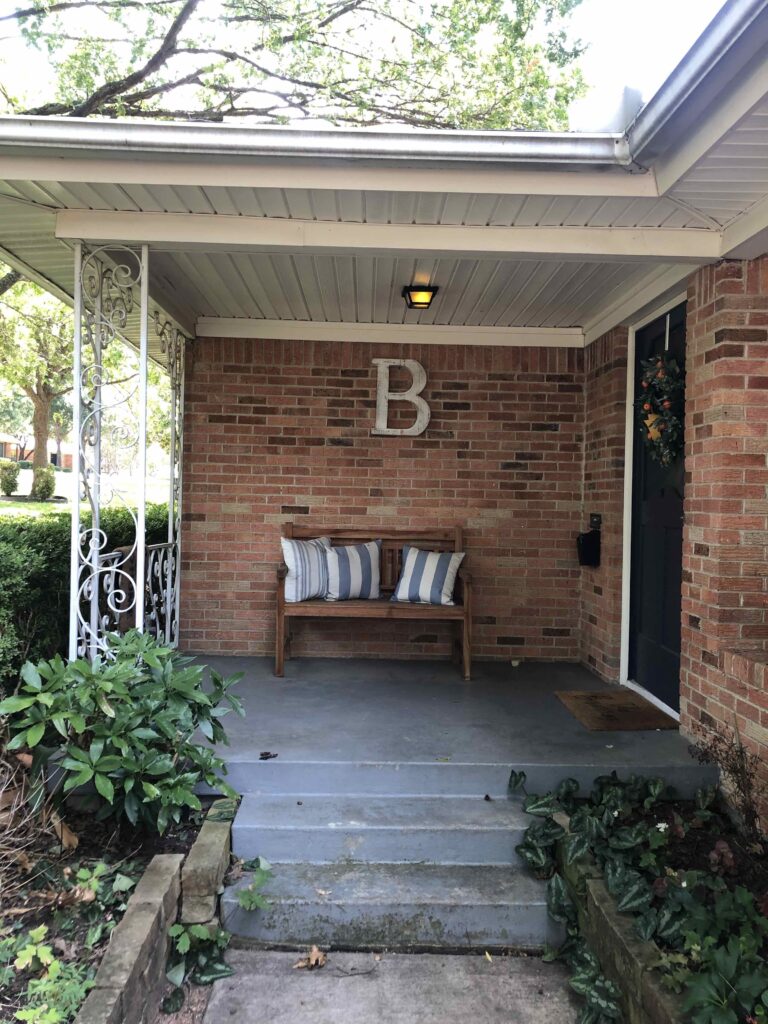
Do you have concrete steps that aren’t in the best condition? Or are your concrete steps painted but continue to chip? I’m here to give you a better solution.
While painted concrete steps seems like a relatively cheap fix, it sadly won’t last.. Paint doesn’t adhere well to concrete in high traffic areas and the fresh paint will quickly wear down as can be seen in the image below.
So today I’m sharing a project our team worked on to give concrete patios a much needed glow up and the design process that went behind them. This article is not a step by step DIY but should give you details behind design considerations when tackling a similar project.
Choose a Material: Wood or Composite Decking?
When it comes to covering concrete steps with wood, you have two choices: traditional wood or composite deck. Traditional wood is a timeless and classic look that will never go out of style. It might require more upkeep than composite decking but can last many years with proper maintenance. Most exposed wood decking will need a fresh coat of stain every 2-3 years to maintain the integrity of the wood.
Composite decking is made from a mix of wood fiber and plastic resin which is low maintenance and can be made to mimic real wood. The pro of composite decking is it won’t splinter and typically comes with a long warranty. In my opinion, the downside is it doesn’t fully achieve that natural wood look. Both materials are available in different colors, textures, and thicknesses.
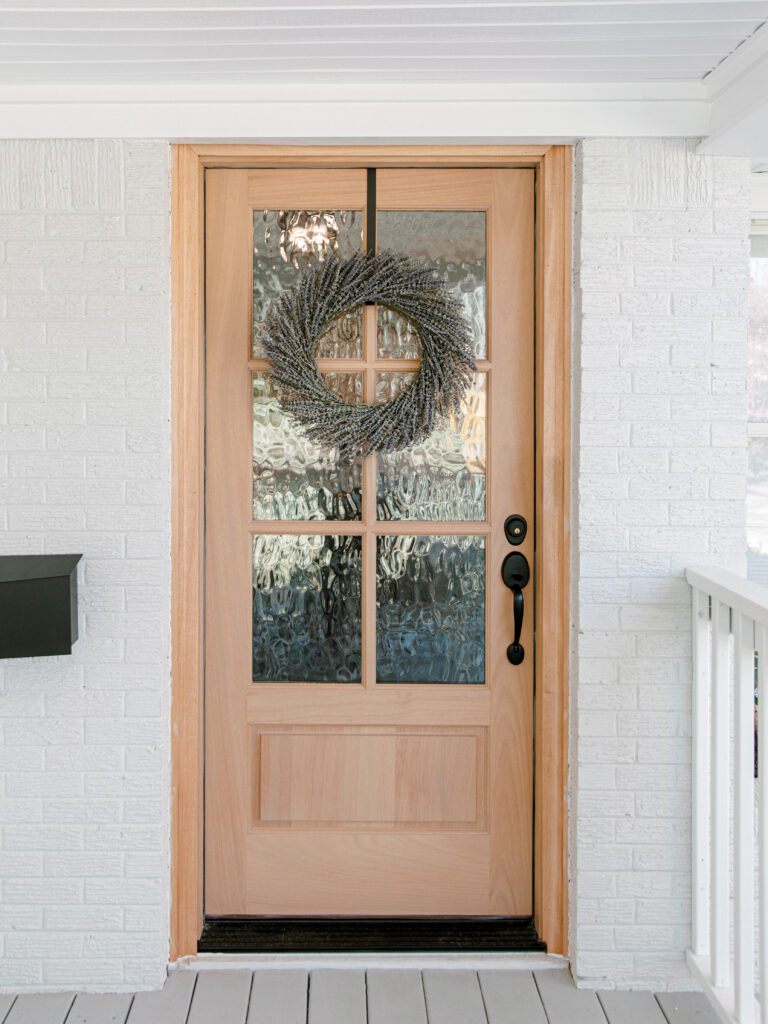
For our project we opted for real wood and used a stain for protection. We specifically used treated pine so that the new decking would withstand the elements.
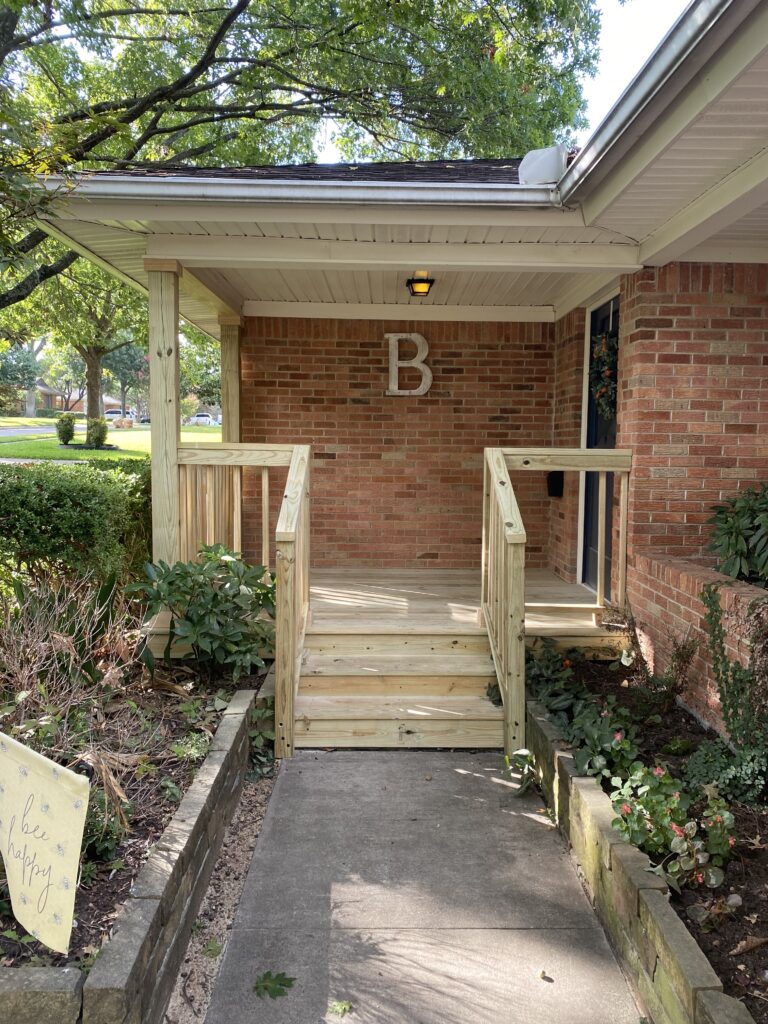
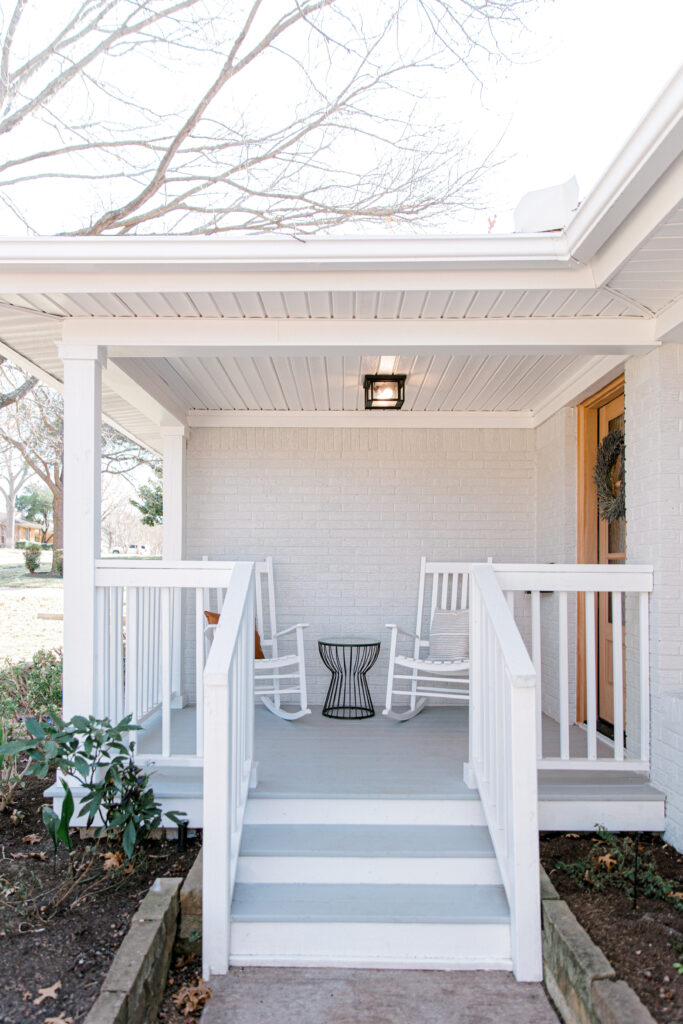
Intentionally Design the Width of Each Step.
The beautiful thing about adding wood to the top of your steps is you are rebuilding the shape. This is your chance to evaluate the stair tread height and to think through the design of the steps/railing. While your concrete steps most likely have a basic shape, I like to give each wood step extra shape by adding an overhang above each riser as a design feature.
Another element to consider when covering the concrete surface is each step width. On our patio project, each step was only 12″ deep but we wanted it to feel like a deck so we extended each step to 16″.
Ensure water will flow out from under the stairs.
Before you begin installing the wood on your concrete steps, you must ensure they are properly sloped for new decking. For all of our projects we work with certified contractors but if you plan to DIY or are hiring a subcontractor for the first time, make sure you ask about a water drainage plan.
If the wood is simply drilled into the concrete and the concrete is not properly angled, you will end up with rotted wood or pooling of water when it rains. This is obviously less of a concern for a covered patio but make sure to assess the area before installation.
If raising the platform is necessary, also make sure that you’re not lifting the upper landing too high for the doorway. It’s important that the door will still open without friction and that you don’t end up with an awkward tripping hazard.
Selecting your finish.
When it comes to stain, there are a number of finishes to select from: transparent, semi-transparent, and solid stain. If you want your steps to have a “painted” look, don’t actually paint the wood! A solid stain will achieve this look and will last much longer than actual paint.
The difference between transparent and semi-transparent stains is how much of the wood grain will show through. There are more color variety options when you opt for a semi-transparent stain so check out all your options at your local home improvements store.
Most importantly, make sure before finalizing your stain decision that you test the color on a wood scrap. Each variant of wood will absorb the stain differently so Googling the stain color will not suffice for how it will look on your new deck. We found this to be especially true for treated woods as they will initially have a green tint.
Light Lead Solid Color Waterproofing Exterior Wood Stain and Sealer (BEHR)
Brick color: Repose Gray
Hopefully you feel inspired to update those concrete steps that have long been overlooked. Or if you want professional help with your design and execution then head over to our “book now” tab.
Sincerely,
HMD

